I have really enjoyed the whole building process but these final stages are really what have been looking forward too, plastering and sculpting details that make it our home.
 |
| As I needed to wait for the walls to dry properly before plastering I carried on with other jobs, like laying the floors first. Here you can see the gravel base which we collected near by and rammed to make the base. |
 |
| Leaving a space for the built in seat |
 |
| ramming the base of the floor |
 |
| The base is finished with a thin layer of concrete to then lay the tiles on. |
 |
| Misheck came back to lay the tiles and did a great job. All the tiles are made locally, we put them in the living area and in one bedroom |
 |
| and we put tiles for the kitchen on the verandah |
 |
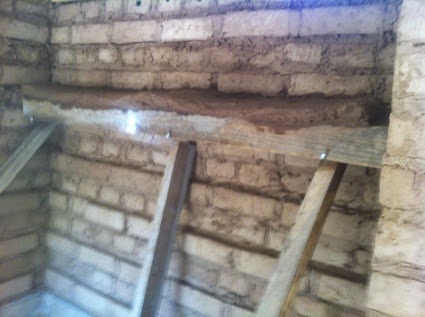
| Making the clay shelves was really fun, I placed bricks underneath to support the earth mixture whilst they dried. These shelves are above the kitchen counter. |
 |
| starting the second shelf |
 |
| I also made shelves inside like this one above the area where the bed will be |
 |
| I collected different coloured earth to test plasters and clay paints, there are beautiful colours and it's a lot of fun mixing and testing |
 |
| I installed the window frames using expansion bolts which worked very well. |
 |
| I glazed all the windows including this one in the door |
 |
| Here you can see the back of the ceiling panels I am trying out, they are reed mats that we have sewn empty and flattened milk cartons and other tetra packs to it. The idea is that it will be like a radiant heat barrier for the roof. |
 |
| Oly helping out with the layers of plaster inside, I have been applying the layers by hand and making any hard edges rounded and soft. I did lots of tests for the best mix, using 4 buckets of pit sand from the plot and 1 of clay worked really well. I have done 2 layers inside so far. |
 |
| Here I am making a base for our bed so that it is raised up and the central area will have space for a large drawer for storage |
 |
| Making the base for the built in seat. |
 |
| I made walls with the adobe bricks and then placed chicken wire between the layers. The spaces underneath the seat are going to be storage spaces. |
 |
| Layering a clay and sand mixture to make the seat. |
 |
| Playing around with pieces of an old broken mirror to see what I will lay into the wall |
 |
| sculpting an 'ndoro in the wall with a piece of mirror in the centre |
 |
| I placed pieces of mirror and cowrie shells between the bottles in the living area |
 |
| a small decorative shelf that I am layering up with a small moroccan door inside |
 |
| Applying the first layer of plaster to the outside, I will finish with a lime plaster for extra protection. |
 |
| More tiles for the verandah |
 |
| I placed some small battery operated fairylights in one of the bottles above the kitchen counter, it makes a nice effect. |
I managed to finish the first layer of plaster on the outside of the house and these extra tiles for a sitting area on the verandah. I'm happy with how the house is coming along, I still need to do some other layers of plaster on the inside and finish with a light yellow clay paint. The outside needs a lime plaster coat and I need to fit the ceiling panels, these are the main jobs to finish off. I am off for a long awaited break and will be back in a few weeks to finish these jobs, and build a store room and retaining wall around the house, then we will be ready to move in!!